
Last Updated: October 31, 2026
Quick Summary
Driveway preparation starts with walking the slab to note cracks and stains, then clearing vehicles, toys, and debris and sweeping the surface. Next, protect plants and drainage, stage your supplies, and check power, water, and nozzle settings before you spray.
- Mark problem spots with chalk so you do not lose track of them once the surface is wet.
- Sweeping first lets detergent reach the concrete instead of a layer of dust.
- For most residential concrete, a pressure range of roughly 2,500 to 3,500 PSI works well.
- A typical two-car driveway takes about 1 to 3 hours with a surface cleaner.
- Never leave a running pressure washer unattended or spray near an outdoor outlet.
Table of Contents
- What to Do Before Pressure Washing: The Prep That Decides the Result
- Clear the Driveway: Vehicles, Toys, and Loose Debris
- Protect Landscaping, Plants, and Drainage Before You Spray
- Driveway Cleaning Supplies and Equipment Staging
- Pressure Washing Driveway Safety: Nozzles, PSI, and Hose Routing
- Match Pressure and Nozzle to Your Driveway Material and Condition
- How Long to Pressure Wash a Driveway and When to Call a Pro
- Schedule Your Driveway Pressure Washing Quote
- Frequently Asked Questions
What to Do Before Pressure Washing: The Prep That Decides the Result
Most driveway cleaning jobs go wrong before the wand is ever switched on. The difference between a clean slab and a streaked, chipped mess usually comes down to the prep work. That is why a solid pressure washing driveway preparation checklist matters more than the machine you rent. If you are still deciding whether the job is worth the effort, see whether pressure washing your driveway is worth it.
Good prep is really about three things: knowing what is on the surface, getting everything out of the way, and setting the machine up so it cannot bite you. Below, we walk through the full driveway preparation process step by step. The payoff is a faster wash, fewer surprises, and a driveway that still looks good weeks later.
Inspect the Driveway and Note Stains First
Walk the whole slab before you touch a hose. Look for cracks, chipped edges, oil spots, rust, and anything growing in the joints. Note where each stain sits so you can treat it directly later.
This short walk is the most skipped step in any pressure washing driveway preparation checklist. A crack that looks harmless can widen fast under a narrow, high-pressure jet. Old concrete with a rough, pitted surface also needs a gentler touch than a newer pour.
Mark problem spots with chalk so you do not lose track of them once the surface is wet.
Check Power, Water Source, and Trip Hazards
Set up your power and water before anything else. A pressure washer needs a steady water supply and a safe electrical connection.
- Water: Confirm the outdoor spigot runs at full flow and the hose reaches the far end of the driveway.
- Power: Use a grounded outlet with a GFCI, and keep cords out of standing water.
- Trips: Move bikes, planters, and loose tools off the path you will walk.
Watch out: a long, thin extension cord can overheat and trip the breaker mid-job. Use a heavy-gauge cord rated for the washer’s draw, or move the machine closer to the outlet.
Clear the Driveway: Vehicles, Toys, and Loose Debris
Clear the slab completely before you spray. Move cars, bicycles, toys, and trash bins to the street or lawn. Then sweep off loose dirt, dust, and leaves with a push broom.
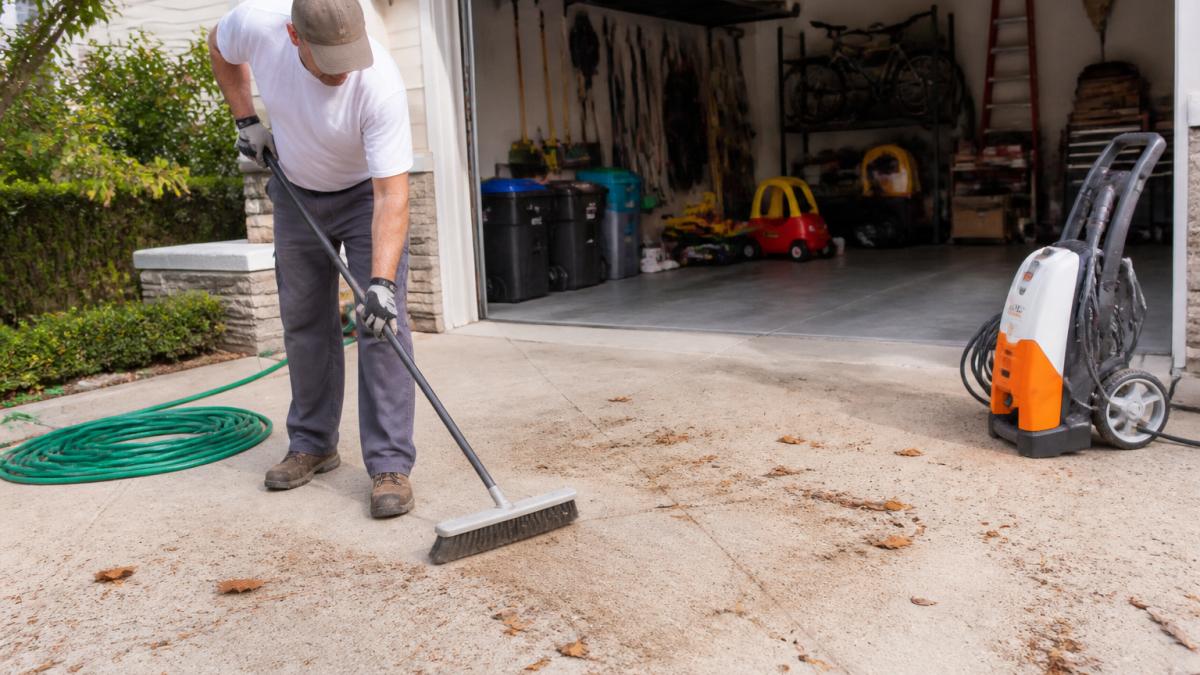
Debris is the quiet troublemaker. Wet leaves and grit turn into a slippery slurry, and small stones become projectiles under pressure. Sweeping first also lets your detergent reach the concrete instead of a layer of dust.
Lift any doormats and grates. Check the edges where the driveway meets the garage and the street, since grit collects there.
Protect Landscaping, Plants, and Drainage Before You Spray
Cover what you want to keep. Wet cardboard, plastic sheeting, or a tarp over shrubs and flower beds will shield them from spray and runoff. Move potted plants well clear of the work zone.
Runoff is the part most guides skip. Pressure washing pushes dirt, detergent, and chemical residue toward the street, and many areas treat that water as stormwater that flows to waterways. Check your local rules through the EPA’s stormwater guidance before you let wash water run into a storm drain. Sweep up what you can, and keep soapy water on the lawn where it can soak in, not in the gutter.
Direct spray away from doors, vents, and downspouts. A quick check of the driveway’s slope tells you which way the water will travel.
Driveway Cleaning Supplies and Equipment Staging
Stage your gear in one spot so you are not walking back and forth. A simple driveway cleaning supplies list keeps the job moving:
- Pressure washer with the right nozzle tips
- Surface cleaner attachment for large flat areas
- Garden hose and a spare pressure hose
- Concrete cleaner or detergent
- Stiff brush for stains
- Safety glasses, gloves, and closed-toe shoes
Mix detergent in the washer’s tank per the label, never stronger than directed. A tidy setup is half of pressure washing driveway safety.
Pressure Washing Driveway Safety: Nozzles, PSI, and Hose Routing
Match the nozzle to the job. A wide fan tip, often 25 or 40 degrees, suits concrete. The narrow 0-degree tip concentrates force and can etch or gouge the surface. Keep it away from concrete unless you are stripping a stubborn stain with care.
For most residential concrete, a pressure range of roughly 2,500 to 3,500 PSI works well. Start lower and test a small hidden patch first. But the nozzle and the PSI are only half of pressure washing driveway safety. The other half is the setup around the machine, and that is where most homeowner injuries and mid-job failures come from.
Electrical checks before you plug in
- Use a GFCI-protected outlet. Outdoor outlets should be GFCI-protected. If yours is not, use a portable in-line GFCI adapter. Water and electricity are the two things this job combines, and a GFCI is the one device that cuts power when current leaks to ground.
- Keep cords out of standing water. Route the cord overhead or along a dry edge, never through a puddle or across the wet path you will walk.
- Match the cord to the draw. A long, thin extension cord can overheat and trip the breaker mid-job. Use a heavy-gauge cord rated for the washer’s draw, or move the machine closer to the outlet.
- Check the cord and plug for damage. Frayed insulation or a missing ground pin is a stop-work condition, not a minor inconvenience.
Water-source checks
- Confirm full flow at the spigot. A pressure washer starved of water cavitates and can damage its pump. Open the spigot fully and check that the supply hose is not kinked.
- Check the hose reach and route. The supply hose should reach the far end of the driveway without stretching across a walkway or driveway where someone might trip.
- Screen the inlet. If your washer has an inlet filter, check it. A clogged screen cuts flow and makes the pump work harder.
- Know your water source. If you are on a well, confirm the flow rate can keep up with the washer’s gallons-per-minute rating before you start.
Trip-hazard and footing checks
- Clear the walking path. Move bikes, planters, hoses, and loose tools off the route you will walk while spraying.
- Route the pressure hose deliberately. Lay it out straight, keep it away from sharp edges and hot surfaces, and never loop it around your feet. Entanglement mid-spray pulls the wand off line, and that is how people get hurt.
- Wear closed-toe, non-slip shoes. Wet concrete and detergent are slippery, and a pressure washer wand can kick back.
- Keep the wand pointed at the ground. Hold it with both hands, keep the tip down, and never point it at a person, a pet, or a window.
- Watch the runoff path. Direct wash water away from doors, vents, and downspouts, and keep it out of storm drains where local rules treat it as stormwater.
Never leave a running pressure washer unattended, and never spray near an outdoor outlet, light fixture, or extension cord connection. Shut the machine off before you move it or change nozzles.
A tidy, deliberate setup is half of pressure washing driveway safety. The other half is knowing when to stop and switch to a gentler method.
Match Pressure and Nozzle to Your Driveway Material and Condition
Not every driveway is plain concrete. The setting that cleans one slab can damage another.
| Driveway Material | Pressure Level | Nozzle Tip | Watch For |
|---|---|---|---|
| New smooth concrete | Low to medium | 40-degree | Surface etching |
| Aged, rough concrete | Medium to high | 25-degree | Loose aggregate |
| Stamped or decorative | Low | 40-degree + surface cleaner | Pattern damage |
| Exposed aggregate | Low to medium | 40-degree | Dislodged stones |
| Asphalt | Low | 25-degree, wide | Rutting and scuffs |
Treat stains before the general wash. Oil, rust, and mildew each respond to different cleaners, so spot-treat first, let it dwell, then rinse. This pre-treatment step is where a careful driveway condition check pays off.
How Long to Pressure Wash a Driveway and When to Call a Pro
A typical two-car driveway takes about 1 to 3 hours for a homeowner with a surface cleaner. Add time for pre-treatment, drying, and cleanup. A single-car slab may finish in under an hour.
Call a pro when the surface is delicate, the stains are stubborn, or the job is simply too big. For a direct look at professional pressure washing vs DIY, compare the costs, risks, and results before you decide. Stamped concrete, steep slopes, and heavy oil damage are all good reasons to hand it off.
Schedule Your Driveway Pressure Washing Quote
Good prep protects your concrete, your plants, and you. When the job calls for a trained eye, a professional can handle the whole checklist for you. Simply Superior Window Cleaning offers window, solar panel, and gutter service, with virtual quote options and flexible maintenance schedules.
Ready to skip the guesswork? Our technicians go through rigorous classroom and on-the-job training, backed by monthly safety meetings.
Schedule a free quote and let us get your driveway looking its best.
Frequently Asked Questions
What should I do before pressure washing a driveway?
Start with a walk-through: note cracks, oil stains, and loose concrete, then move vehicles, bicycles, and toys off the slab. Sweep or blow off loose debris and dirt so the washer does not drive grit into the surface. Cover or wet sensitive plants, check that the water source and extension cord are clear of standing water, and confirm your nozzle and PSI match the driveway material before you pull the trigger.
Do I need to sweep my driveway before pressure washing?
Yes. Loose dirt, dust, and small debris act like sandpaper under a spray tip, and they also clog surface cleaners and dull the cleaning pattern. A quick pass with a push broom or leaf blower takes a few minutes and lets detergent and water reach the concrete instead of the grit on top of it. Sweep debris away from storm drains rather than into them.
How long does it take to pressure wash a driveway?
A typical two-car concrete driveway takes roughly one to three hours with a surface cleaner, and longer with a hand wand alone. Prep adds time: clearing obstacles, sweeping, pre-treating stains, and protecting landscaping can add 30 to 60 minutes. Weather matters too, since shade, wind, and humidity change how fast detergent dwells and the concrete dries.
Should I wet plants before pressure washing a driveway?
Yes. Pre-wetting grass, shrubs, and sensitive plants before you spray, and rinsing them again afterward, dilutes any detergent or bleach overspray before it can burn leaves. Cover delicate landscaping with a tarp where runoff is likely, and direct dirty water away from plant beds and storm drains. Skip harsh chemicals near edible gardens and check local runoff rules first.
Your driveway does not have to be a weekend project you dread. Simply Superior Window Cleaning brings trained technicians, the right equipment, and flexible scheduling to every job, so you get a clean surface without the risk. Get started with Simply Superior Window Cleaning and schedule a free quote today.