
Table of Contents
- What You’ll Need to Pressure Wash Siding Safely
- Step 1: Inspect Siding and Prep the Area
- Step 2: Choose the Best PSI for Vinyl Siding
- Step 3: Select the Right Nozzle Tips and Spray Pattern
- Step 4: Apply Pressure Washing Siding Chemicals
- Step 5: Pressure Wash Siding Without Damage Using Bottom-Up Motion
- Soft Washing vs Pressure Washing Siding: Which Is Safer?
- Common Mistakes That Damage Siding (and How to Fix Them)
- Frequently Asked Questions
Last Updated: September 4, 2026
Pressure washing restores a home’s exterior fast, but getting the technique wrong can cause thousands in damage. Learning how to pressure wash siding without damage comes down to controlling three variables: water pressure, spray angle, and cleaning method. This guide from Simply Superior Window Cleaning walks through the exact process our technicians use to clean vinyl, aluminum, and wood siding safely.
The most common homeowner error is assuming more pressure equals cleaner siding. Excessive psi can blast water behind panels, crack caulk lines, and etch soft materials. We will show you the correct pressure settings, nozzle color coding, and motion patterns that protect your home while delivering a thorough clean. If you would rather leave this job to trained professionals, our team handles pressure washing for properties throughout Ventura and North LA Counties.
What You’ll Need to Pressure Wash Siding Safely
Gathering the right equipment before you start prevents mid-project frustration and accidental damage. You do not need commercial-grade machinery, but you do need tools with adjustable output rather than a single fixed pressure.
Pressure Washer: Electric vs. Gas
For residential siding, an electric pressure washer rated between 1,200 and 1,500 psi with a flow rate of 1.2 to 1.5 gallons per minute (GPM) is the sweet spot (the CDC). Electric units are quieter, lighter, and require no fuel mixing, making them ideal for a first-time user who wants predictable, lower pressure.
Gas-powered units (typically 2,000 to 3,200 psi) are what most rental yards carry, and they bring a critical risk: at 2,500 psi, even a 25-degree nozzle can cut into vinyl if you hold it closer than 6 inches (hud.gov). If you rent a gas unit, use the machine’s unloader valve to drop the pressure at the gun, or ask for a unit with a variable pressure trigger that lets you dial down to 1,200 psi at the wand.
Nozzle Tips: The Color Code That Saves Your Siding
A full set of color-coded tips is non-negotiable. The color indicates the spray angle, which directly controls the force delivered to the surface. For siding work, you will use only the white (40-degree) and black (65-degree) tips for rinsing and chemical application. The green (25-degree) tip is a last resort for stubborn stains and only when held at least 24 inches from the wall. Red and yellow tips are for concrete and stripping paint, they have no place on a siding job.
Detergent Application: Downstreaming vs. Garden Sprayer
Most consumer pressure washers have a detergent tank that siphons soap at low pressure, but it dilutes the chemical and can leave streaks. A dedicated garden sprayer (a 2-gallon pump sprayer) gives you precise control over concentration and lets you apply chemical before you start the machine, separating the cleaning step from the rinsing step.
The Complete Checklist
- Pressure washer: Electric 1,200-1,500 psi (1.2+ GPM) or a gas unit with a working unloader valve. If renting, ask for a unit with a variable pressure trigger.
- Nozzle tips: White (40°), black (65°), and green (25°) as a backup. Never use red or yellow on siding.
- Siding cleaning solution: A biodegradable, oxygen-bleach-based detergent. Avoid sodium hypochlorite (bleach) mixes above 1% concentration, as they can fade vinyl and kill landscaping (the EPA).
- Garden sprayer (2-gallon): For precise chemical application before rinsing.
- Extension wand: A 24-inch extension keeps you off the ladder and lets you maintain the proper 12-18 inch standoff distance from the wall.
- Protective gear: Safety glasses with side shields, closed-toe rubber boots, and non-slip gloves. Hearing protection if using a gas unit.
- Drop cloths and plastic sheeting: To cover foundation plantings, exterior outlets, and light fixtures. Tape plastic over outlets with painter’s tape.
If you are renting, ask the yard for a surface cleaner attachment, but only for the driveway, not the siding. A surface cleaner spins a zero-degree jet inside a shroud, which is safe on flat concrete but will gouge vertical siding.
A common mistake is skipping the chemical step entirely and relying on pressure alone. Detergents break down mildew growth and oxidation so the rinse cycle can do the work, which means you can run the wand at a safer, lower setting.
Step 1: Inspect Siding and Prep the Area
Before water touches the wall, walk the perimeter and look for existing issues that pressure washing would worsen. Cracked panels, loose corners, and gaps around windows or doors allow water intrusion behind the siding, where it can lead to rot and mold.
Check for these conditions first:
- Loose or buckling panels that need re-securing
- Deteriorated caulk around windows, doors, and trim
- Cracks or holes that should be patched before washing
- Electrical outlets and exterior fixtures that need covering
- Landscaping and furniture that should be moved or protected
This inspection step is also the time to identify the siding material. Vinyl siding is the most forgiving and tolerates moderate pressure, while aluminum siding dents easily and wood siding can splinter or gouge under a narrow spray.
Never spray directly into weep holes, the small slits at the bottom edge of vinyl siding panels. Forcing water upward into these openings can flood the wall cavity behind the siding, leading to moisture buildup and structural issues over time.
Step 2: Choose the Best PSI for Vinyl Siding
The best PSI for vinyl siding falls between 1,200 and 1,500 psi when using a wide fan spray. This range is strong enough to remove dirt and mildew growth without risking surface damage or forcing water behind the panels.
For other materials, adjust accordingly. Aluminum siding should be washed at the low end of that range, around 1,200 psi, because higher pressure can dent the soft metal. Wood siding requires even more caution, typically no more than 800 to 1,000 psi, and benefits from a wider spray angle. If your machine only outputs higher pressure, compensate by standing farther from the wall and using the widest nozzle tip available.
Test your pressure setting on an inconspicuous section of siding, such as a corner near the foundation, before working across the main wall. Hold the wand steady for a few seconds and inspect for etching, color change, or water penetration. Adjust down if you see any issues.
Step 3: Select the Right Nozzle Tips and Spray Pattern
Nozzle tips are color-coded by spray angle, and selecting the wrong one is the leading cause of siding damage. The color indicates the degree of the fan spray, which directly controls the force delivered to the surface.
| Nozzle Color | Spray Angle | Best Use | Safe for Siding? |
|---|---|---|---|
| Red | 0 degrees | Heavy stripping | No, concentrated jet |
| Yellow | 15 degrees | Concrete, brick | Use with extreme caution |
| Green | 25 degrees | General cleaning | Yes, for tough stains |
| White | 40 degrees | Soft washing | Yes, safest choice |
| Black | 65 degrees | Detergent application | Yes, lowest pressure |
For siding, the white 40-degree tip is the safest starting point. It disperses the water over a wide area, reducing the force per square inch. The green 25-degree tip works for stubborn stains but requires greater distance from the wall. Never use red or yellow tips on any siding material, as the concentrated stream can cut through panels and leave permanent grooves.
Step 4: Apply Pressure Washing Siding Chemicals
Pressure washing siding chemicals are applied at low pressure before the rinse cycle, allowing them time to break down grime rather than relying on water force. This two-step approach separates a safe clean from a damaging one, but it has two hidden risks: leaving residue that streaks, and letting runoff kill your landscaping or contaminate local storm drains.
Choosing the Right Chemical for Your Siding Material
- Vinyl siding: Use an oxygen bleach (sodium percarbonate) based cleaner. It breaks down mildew and organic stains without the harshness of chlorine bleach. Mix according to label directions, typically 1 cup per gallon of water. Oxygen bleach is color-safe and will not fade vinyl panels.
- Aluminum siding: Aluminum oxidizes into a chalky, gray film. A trisodium phosphate (TSP) alternative (often labeled “TSP substitute” or “phosphate-free”) lifts that oxidation without etching the metal. TSP itself is effective but is restricted in some areas due to phosphate runoff concerns; check your local regulations before using it.
- Wood siding: Use a gentle, pH-neutral wood cleaner or a diluted oxygen bleach solution. Avoid anything with sodium hydroxide or strong acids, which can strip paint and raise the grain.
Application Technique That Prevents Streaks
Mix your detergent according to the manufacturer’s instructions, then apply it using the black 65-degree nozzle or a garden sprayer. Work in sections of roughly 10 feet, starting at the bottom of the wall and moving upward to prevent chemical from running down over dry areas and creating tide lines.
Dwell time is the variable most homeowners get wrong. The solution needs five to ten minutes to break down mildew and oxidation. Less time means the chemical doesn’t work; more time means it dries on the surface, leaving a chalky residue that is nearly impossible to rinse off. On a hot, sunny day (above 80°F), dwell time drops to three to five minutes. Work in shaded sections first, or pick a cloudy day for the job. If the solution starts to dry, re-wet it with a light mist from the garden hose before rinsing.
Protecting Landscaping and Storm Drains from Runoff
Pressure washing runoff carries detergent, mildew spores, and oxidized paint particles. In many municipalities, that runoff is classified as an illicit discharge if it enters a storm drain, because it can harm aquatic life.
Before you start:
- Soak foundation plantings and grass with plain water. Wet plants are less likely to absorb chemical residue.
- Cover delicate shrubs and flowers with plastic sheeting or old drop cloths. Secure the edges with bricks or landscape staples.
- Divert runoff away from storm drains. Use a sandbag or a rolled towel at the base of the wall to channel water toward an area of your yard that can absorb it, such as a lawn or garden bed.
- Rinse vegetation thoroughly with plain water immediately after you finish washing. This dilutes any chemical that splashed onto leaves.
Never let detergent runoff flow directly into a storm drain. In many areas, this violates local clean water ordinances and can result in fines. More importantly, it introduces phosphates and surfactants into local waterways, contributing to algae blooms and harming fish. A simple sandbag barrier at the edge of your driveway is enough to redirect flow.
The Bottom Line on Chemicals
The detergent does the cleaning; the pressure washer only rinses. Applying chemicals first lets you run the machine at a lower, safer psi while still achieving a spotless result. A few minutes of prep saves you from dead shrubs and a citation.
Choose an oxygen-bleach cleaner for vinyl, a TSP alternative for aluminum, and a pH-neutral wood cleaner for timber. Apply bottom-up, respect dwell time (5-10 minutes, less in heat), and always soak nearby plants and block runoff from entering storm drains before you start.
Step 5: Pressure Wash Siding Without Damage Using Bottom-Up Motion
The correct rinsing technique involves working from the bottom of the wall upward, using a smooth, sweeping motion with the wand held at a slight downward angle. This prevents water from running down and streaking over already-cleaned areas.
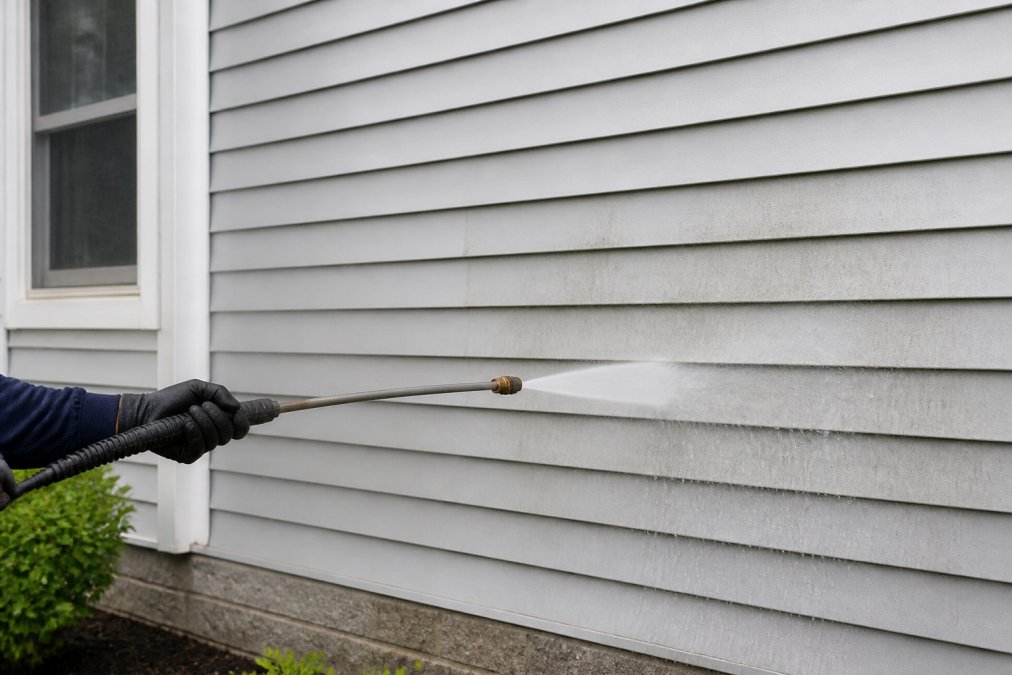
Hold the wand about 12 to 18 inches from the siding and keep the spray moving in long, overlapping horizontal passes. Never hold the wand stationary on one spot, as even a wide fan spray can concentrate force and damage the surface. For vertical panels, use a side-to-side motion; for horizontal lap siding, follow the seam lines.
After rinsing each section, step back and inspect for missed spots or soap residue. If streaks remain, reapply detergent rather than increasing pressure.
Spraying from top to bottom forces water to run down over dry detergent, creating streaks that are difficult to remove. It also pushes water up and behind the siding panels at the seams. Always work bottom-up for a clean, damage-free result.
Soft Washing vs Pressure Washing Siding: Which Is Safer?
Soft washing is a low-pressure cleaning method that relies primarily on specialized detergents to kill mildew growth and lift dirt, using water at roughly 100 to 500 psi. Pressure washing uses higher force to physically blast contaminants off the surface. For most residential siding, soft washing is the safer option.
Vinyl, aluminum, and painted wood are all susceptible to damage from excessive pressure. Soft washing eliminates that risk almost entirely, making it ideal for delicate surfaces, older homes, and areas with heavy organic growth. Pressure washing remains useful for tougher surfaces like concrete driveways or brick.
Many professional services, including those offered by Simply Superior Window Cleaning, favor soft washing for siding because it protects the home while delivering results. Homeowners can replicate this approach by using the widest nozzle tip, the lowest effective pressure, and a quality cleaning solution applied before rinsing.
Common Mistakes That Damage Siding (and How to Fix Them)
Even careful homeowners make errors. Here are the most frequent issues and their solutions.
Water intrusion behind panels. If you sprayed upward at the seams, water may have gotten behind the siding. Fix this by allowing the wall to dry thoroughly and checking for signs of moisture inside the home over the following days. Persistent dampness or a musty odor may require professional assessment.
Etched or gouged siding. A narrow nozzle held too close can leave visible marks. Minor etching on vinyl may be less noticeable once dry, but deep gouges often require panel replacement. This is why starting with a wide spray and testing an inconspicuous area is critical.
Detergent residue or streaks. This occurs when chemicals dry before rinsing or when rinsing top-down. Rewash the affected area with clean water at low pressure, working bottom-up, and ensure complete removal of the soap.
Damaged landscaping from chemical runoff. Detergents and mildew killers can harm plants. Rinse vegetation thoroughly with plain water after washing and consider using environmentally friendly cleaning solutions to minimize the impact of runoff on your yard.
If the job feels overwhelming or you are concerned about your home’s specific siding condition, professional help is a reasonable alternative. Simply Superior Window Cleaning provides pressure washing services with technicians trained to match the right method to your siding material.
Frequently Asked Questions
What PSI will damage vinyl siding?
Anything above 2,000 PSI risks cutting or cracking vinyl siding, especially if you hold the nozzle too close. Even at lower pressures, a narrow 0-degree nozzle tip concentrates force and can gouge the material. For most vinyl, stay between 1,200 and 1,500 PSI with a 25 or 40-degree fan spray. If your machine only has a high-pressure setting, switch to soft washing instead.
How do you prevent water from getting behind siding?
Always spray at a downward angle, never straight up or directly into the bottom edge of the panels. Work from the bottom up so water flows over the surface rather than being forced under the laps. Keep the wand at least 12 inches from the wall, and avoid targeting weep holes, vents, light fixtures, and window seams. Sealing gaps with caulk before washing also helps block water intrusion.
Is soft washing better than pressure washing for siding?
Soft washing is safer for most siding types because it relies on low pressure (under 500 PSI) combined with cleaning chemicals to kill mildew and algae at the root. Pressure washing works well for tough grime on durable surfaces like vinyl, but it risks water intrusion and surface damage if done wrong. For wood, stucco, or older siding, soft washing is the recommended choice.
What is the best cleaning solution for pressure washing siding?
A dedicated siding cleaner or a mix of oxygen bleach and water removes mildew and oxidation without harming plants or the environment. Avoid chlorine bleach at full strength because it can discolor vinyl and kill landscaping. Apply the solution with a low-pressure sprayer, let it sit for 5 to 10 minutes, then rinse with plain water using a wide fan spray.
This article was written using GrandRanker