
Last Updated: November 5, 2026
Quick Summary
Choose an exterior paint primer by matching it to your surface and exposure. Water-based acrylic or latex primers suit most siding, masonry, stucco and concrete because they stay flexible, while oil-based primers work better on heavily stained wood, bare metal and chalky surfaces. Always check the label for exterior rating and recoat times.
- Water-based primers suit cedar, redwood and pine siding because their flexible film moves with the wood.
- Oil-based primers lock in tannins and knots on heavily stained or knotty wood.
- Never prime damp wood or masonry, because trapped moisture causes blistering within one season.
- Wait for an oil-based primer to fully cure before applying a water-based topcoat.
- Most bare or new surfaces need one coat, while heavily stained wood may need two.
Table of Contents
- Why Exterior Primer Choice Affects How Long Your Paint Lasts
- How to Choose Exterior Paint Primer for Wood Surfaces
- Exterior Primer for Masonry, Stucco and Concrete
- Oil-Based vs. Water-Based Exterior Primer: Which to Use
- Matching Primer to Your Climate and Exposure
- How Many Coats of Exterior Primer You Really Need
- Surface Prep and Application Mistakes That Undermine Primer
- Getting a Quote Before Your Exterior Paint Job
- Frequently Asked Questions
Why Exterior Primer Choice Affects How Long Your Paint Lasts
The paint on a house is only as durable as the primer under it. Picking the right exterior paint primer is one of the most important decisions you will make before a repaint. A good primer grips the surface, seals it, and gives the topcoat something to hold onto.
Primer does three main jobs. It helps paint stick, it blocks stains and tannins from bleeding through, and it evens out the surface so the final color looks right. Skip it, or use the wrong type, and you may see peeling or blistering within a few seasons.
Most primer problems come from a few predictable mistakes:
- Using an interior primer outdoors
- Painting over a dirty or chalky surface
- Choosing a primer that does not suit the material
- Applying it in cold, damp, or direct-sun conditions
We recommend reading the primer label before you buy. Look for “exterior” on the label and check the recommended surfaces and application temperature.
How to Choose Exterior Paint Primer for Wood Surfaces
Wood is the most common surface we see paired with the wrong primer. Bare wood soaks up coatings unevenly and releases tannins that can stain a fresh topcoat brown or yellow. An exterior primer made for wood should seal those tannins and bond well to the grain.
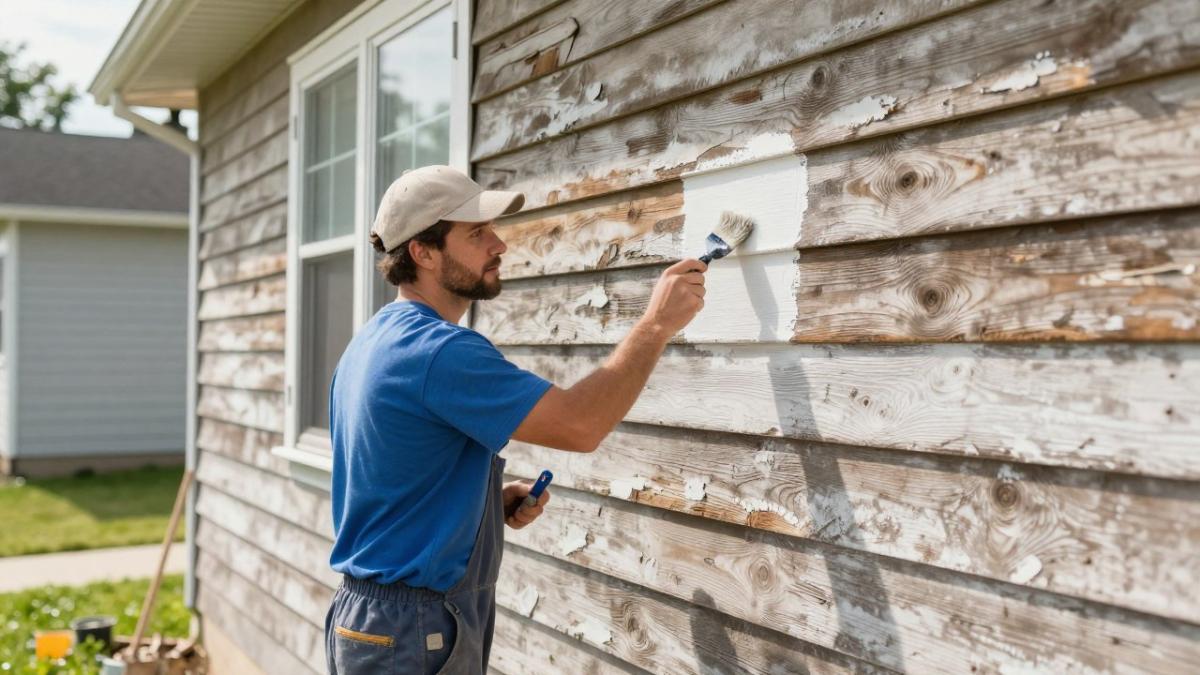
Look for these features on the label:
- Stain-blocking for cedar, redwood, or other tannin-rich woods
- Exterior-grade rating for weather resistance
- Acrylic or latex base for flexibility on wood that expands and contracts
- Primer-sealer labeling for raw or weathered boards
For older siding that has gone gray, scrub it clean and let it dry fully before priming. Moisture trapped under primer is a common cause of early failure.
Watch out: Priming damp wood traps water inside the coating and often leads to blistering within one season.
Exterior Primer for Masonry, Stucco and Concrete
Masonry, stucco, and concrete are porous, so they need a primer that can penetrate and bond. A masonry-specific exterior primer typically uses an acrylic or latex base that resists alkaline surfaces and moisture. Stucco is especially tricky because new stucco needs to cure before painting, and many manufacturers recommend waiting several weeks.
Check the product for alkali resistance and whether it is labeled for masonry or stucco. Cleaning the surface first removes chalk and dirt that would otherwise weaken adhesion. For help with preparing the exterior before painting, see our guide on pressure washing companies in Ventura and North LA Counties.
Oil-Based vs. Water-Based Exterior Primer: Which to Use
The oil-versus-water decision is where most exterior primer mistakes start, because the two chemistries behave differently on the same wall. Neither is universally better; the right choice depends on the surface, the topcoat, and the exposure.
How each type actually works. Oil-based primers cure by solvent evaporation followed by oxidation, forming a hard, tight film that penetrates chalky or weathered substrates and locks in tannins and knots. Water-based acrylic and latex primers cure by water evaporation and coalescence, forming a flexible film that moves with wood as it expands and contracts. That flexibility is why acrylic primers dominate on siding in climates with wide temperature swings.
Where oil-based still wins:
- Heavily stained or knotty wood where tannin bleed is likely
- Bare metal and galvanized steel, where an alkyd or oil primer provides a reliable bond
- Chalky, weathered surfaces that need deep penetration before a topcoat
- Spot-priming over old oil-based paint, provided the surface is sound and clean
Where water-based wins:
- Cedar, redwood, and pine siding that moves with moisture and temperature
- Masonry, stucco, and concrete, where alkali-resistant acrylic primers are the standard
- Large exterior jobs where fast dry and soap-and-water cleanup matter
- Any project where low odor and lower VOC content is a priority
The compatibility trap. The most expensive mistake is putting a water-based topcoat over a fresh oil-based primer before it has fully cured, or the reverse. A common pattern is a homeowner who primes with oil in the morning and topcoats with acrylic the same afternoon; the result is poor adhesion and early peeling because the oil film has not finished curing. Always follow the recoat window on the label, and when in doubt, test a small area first. A second trap is applying a hard oil primer under a flexible acrylic topcoat on wood that moves; the rigid underlayer can crack and take the topcoat with it.
Cost and coverage trade-offs. Oil-based primers require mineral spirits for cleanup, which adds cost and disposal hassle. Acrylic primers clean up with water. Factor in coverage, number of coats, and cleanup before comparing price.
Regulatory and practical notes. Many areas restrict or limit the use of oil-based products because of VOC content, so check local rules before buying. Oil-based primers also carry stronger fumes and longer dry times, which can push a project into a second day.
Our general guidance:
- Water-based for most siding, masonry, and general exterior work
- Oil-based for heavily stained wood, bare metal, or surfaces where stain-blocking is critical
- Never mix chemistries without confirming the recoat window and compatibility on the label
Watch out: Applying a water-based topcoat over an oil-based primer that has not fully cured is one of the most common causes of exterior paint peeling within a single season.
The two primer chemistries behave differently, so the right choice depends on the surface and exposure.
| Surface | Best primer type | Key reason |
|---|---|---|
| Cedar, redwood, pine siding | Water-based | Flexible film moves with wood |
| Masonry, stucco, concrete | Water-based | Alkali-resistant acrylic is the standard |
| Heavily stained or knotty wood | Oil-based | Locks in tannins and knots |
| Bare metal, galvanized steel | Oil-based | Reliable bond on metal |
| Chalky, weathered surfaces | Oil-based | Deep penetration before topcoat |
| Large jobs, low odor priority | Water-based | Fast dry, soap-and-water cleanup |
Matching Primer to Your Climate and Exposure
Most exterior primer guides stop at “pick a primer for your climate” without saying what that means in practice. The gap competitors miss is that primer performance is driven by four exposure forces, UV intensity, moisture cycling, salt air, and temperature swing, and each one points to a different product attribute.
UV and heat. Walls that take direct afternoon sun on south and west elevations expand and contract more than shaded walls, and UV degrades rigid films faster. A flexible acrylic primer that moves with the substrate outperforms a hard oil film on sun-baked wood siding. On masonry, a UV-stable acrylic primer resists chalking better than a cheap alkyd.
Moisture cycling and humidity. In humid or coastal areas, primer must resist mildew and allow the wall to dry. Look for a mildew-resistant label and avoid trapping moisture under a tight film. The mechanism matters: primer applied over damp wood or masonry traps water, and as the sun heats the wall, that water turns to vapor and blisters the coating. Always confirm moisture content with a meter before priming.
Salt air. Coastal exposure accelerates corrosion on metal and degrades cheap films on wood and masonry. On metal near the coast, an oil-based or rust-inhibitive primer is the safer choice; on wood and masonry, a high-quality acrylic with mildew resistance holds up better than a budget product.
Temperature swing and rain. In areas with wide day-night swings and occasional heavy rain, flexibility and recoat timing matter more than brand. Apply within the label’s temperature range, and make sure gutters are clear so water does not sheet down fresh primer.
A practical way to choose:
- Sunny, exposed walls: flexible acrylic primer with UV resistance
- Shaded or north-facing walls: mildew-resistant formula and careful drying time
- Coastal or humid areas: mildew-resistant acrylic on wood and masonry; rust-inhibitive oil on metal
- Heavy-rain areas: confirm drainage and recoat windows before starting
Watch out: Priming a wall that is damp from morning dew or recent rain is a leading cause of blistering, even when the primer itself is the right type for the climate.
How Many Coats of Exterior Primer You Really Need
For most bare or new surfaces, one coat of a quality exterior primer is enough. Heavily stained wood, dark colors being covered by light paint, or highly porous masonry may need two coats. Many people ask how many coats of exterior primer they need, and the honest answer depends on the surface and what color you are painting over.
Read the label for recommended coverage and recoat times. Rushing the next coat can trap solvents and cause adhesion problems.
Surface Prep and Application Mistakes That Undermine Primer
Even the best primer fails on a dirty surface. Clean the exterior thoroughly, remove loose paint, and let everything dry completely. Here are the mistakes we see most often:
- Painting over mold or mildew without cleaning it first
- Skipping sanding on glossy surfaces
- Applying primer in temperatures below the label minimum
- Ignoring clogged gutters that send water down the walls
Clogged gutters deserve special attention. Overflowing water can soak into siding and ruin fresh primer and paint. For more on this, see our article on preventing water damage from clogged gutters. Cleaning the exterior with professional care, as explained in our exterior cleaning guide for selling your home, gives primer the clean base it needs.
Watch out: Painting over a dirty surface is the fastest way to waste money on primer and topcoat.
Getting a Quote Before Your Exterior Paint Job
For help comparing companies, read our pressure washing companies guide. For current pricing or a quote, visit Simply Superior Window Cleaning’s website.
Frequently Asked Questions
What kind of primer should I use for exterior paint?
Match the primer to the surface and the topcoat. Bare wood, masonry and metal each need a primer formulated for that substrate, and water-based acrylic primers suit most exterior jobs over previously painted surfaces. Check the label for adhesion to the material, tannin-blocking for wood with knots or redwood, and stain-blocking if you are covering old water stains or chalky finishes. A primer rated for exterior use will resist moisture and UV exposure better than an interior product. Ask your paint retailer to confirm the primer works with the topcoat you plan to use.
Do I really need two coats of primer?
Two coats of primer are needed when you are covering bare or heavily stained surfaces, switching between very different colors, or working over porous material like raw masonry or unfinished wood. One coat of a quality primer is usually enough over sound, previously painted surfaces that are cleaned and sanded. Check the manufacturer’s recommended spreading rate and dry time, since thin application leaves gaps in coverage. Two coats also improve sealing of porous substrates, which helps the topcoat bond and reduces the chance of peeling or blistering later.
Should I use oil-based or water-based primer outdoors?
Water-based acrylic or latex primers are the common choice for exterior work because they dry quickly, clean up with water, and allow moisture vapor to escape. Oil-based primers adhere well to bare wood and tannin-prone surfaces and can seal stubborn stains, but they take longer to cure and require solvent cleanup. Pair oil primer only with compatible topcoats, and confirm that the topcoat you choose is safe over it. Application temperature and humidity affect both types, so follow the label’s temperature range before you start.
Can I paint over old exterior paint without primer?
You can often skip primer when the existing paint is sound, the surface is clean, and the new topcoat is the same type and similar color. Primer is still recommended when the old paint is peeling, chalking, or glossy, when you are changing from a dark to a light color, or when repairs have exposed bare substrate. Test adhesion by applying a strip of tape to the old finish and pulling it off quickly. If paint lifts, scrape and prime the affected areas before topcoating.